A Case Study in "Reactizing" a Complex Backbone View
As part of our new "Custom Activities" feature, it became apparent the changes required for the "Custom Fields" modal were significant enough that the component needed a rewrite. Our Custom Fields modal at this point was a component written in Backbone - as much of the original core FE codebase for Close still is. We've been slowly chipping away at this Backbone code, when opportunity allows, and replacing with React components - a process we call "Reactizing". Our Custom Fields modal has long been a candidate for this, but we've kicked that can down the road a few times. It's much more important to us to efficiently use engineering time to deliver new features than to rewrite code for the sake of it. It's always a tricky balance, as we want to keep our tech debt at manageable levels, but we've also learned that Reactizing Backbone Components is a time-consuming process, which almost always goes over initial time estimates, and it's easy to introduce regressions.
When thinking about this tradeoff and trying to decide when the time is right to invest in a significant refactor, I'm always reminded of Joel Spolsky's Things You Should Never Do. In this case we really do want to throw our code away, but we want to do it in a controlled and manageable way, keeping the years of effort and bugfixes that have gone into it already. Below is a breakdown of the process we've developed to mitigate problems as much as possible.
Summary (TL;DR)
- Audit the UI and code.
- Ensure the existing Backbone View has "full" test coverage.
- Port tests over to a new empty React Component.
- Build out the new React component using TDD, don't be tempted to add new features yet.
- Replace the Backbone View with the new React Component and do full E2E/manual tests.
- Delete the Backbone View.
- Live in Peace and Harmony. 🧘
Beware Dragons 🐉
Before we dive in, let's take a look at the component:
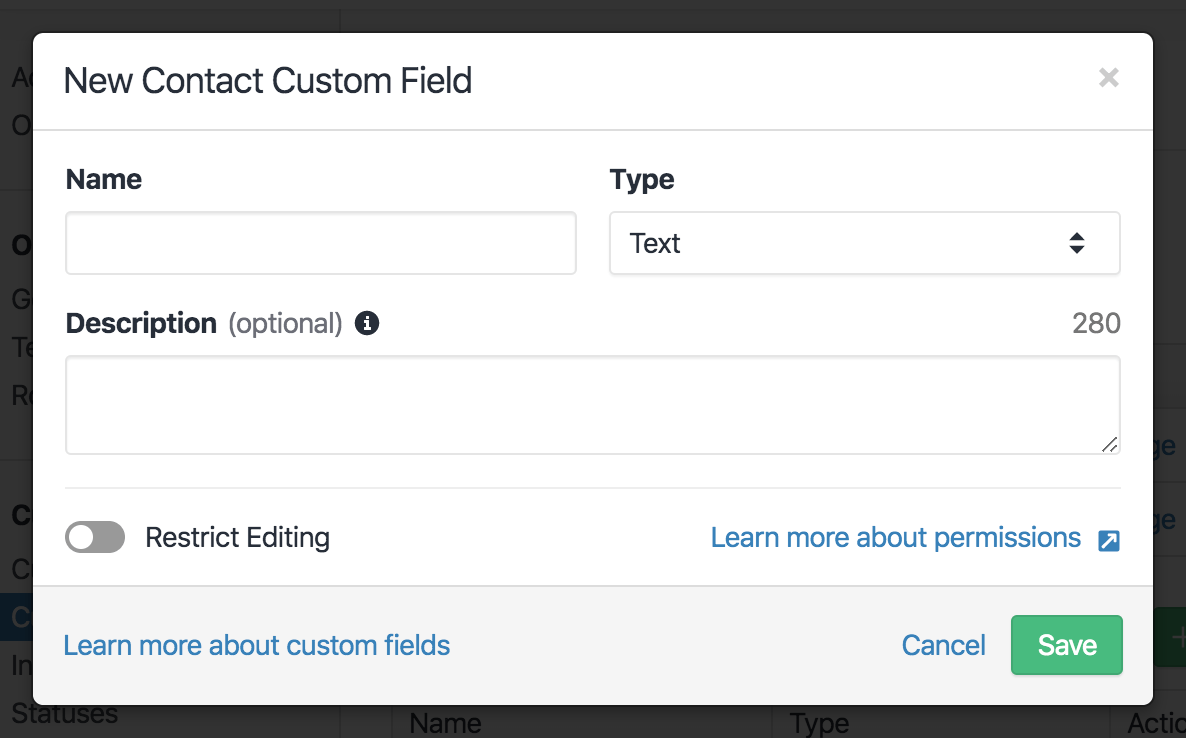
Not much to it hey? You could probably knock out a new React Component to handle this in a day or two right?
But what about if you choose "Choices" from the Type Select:
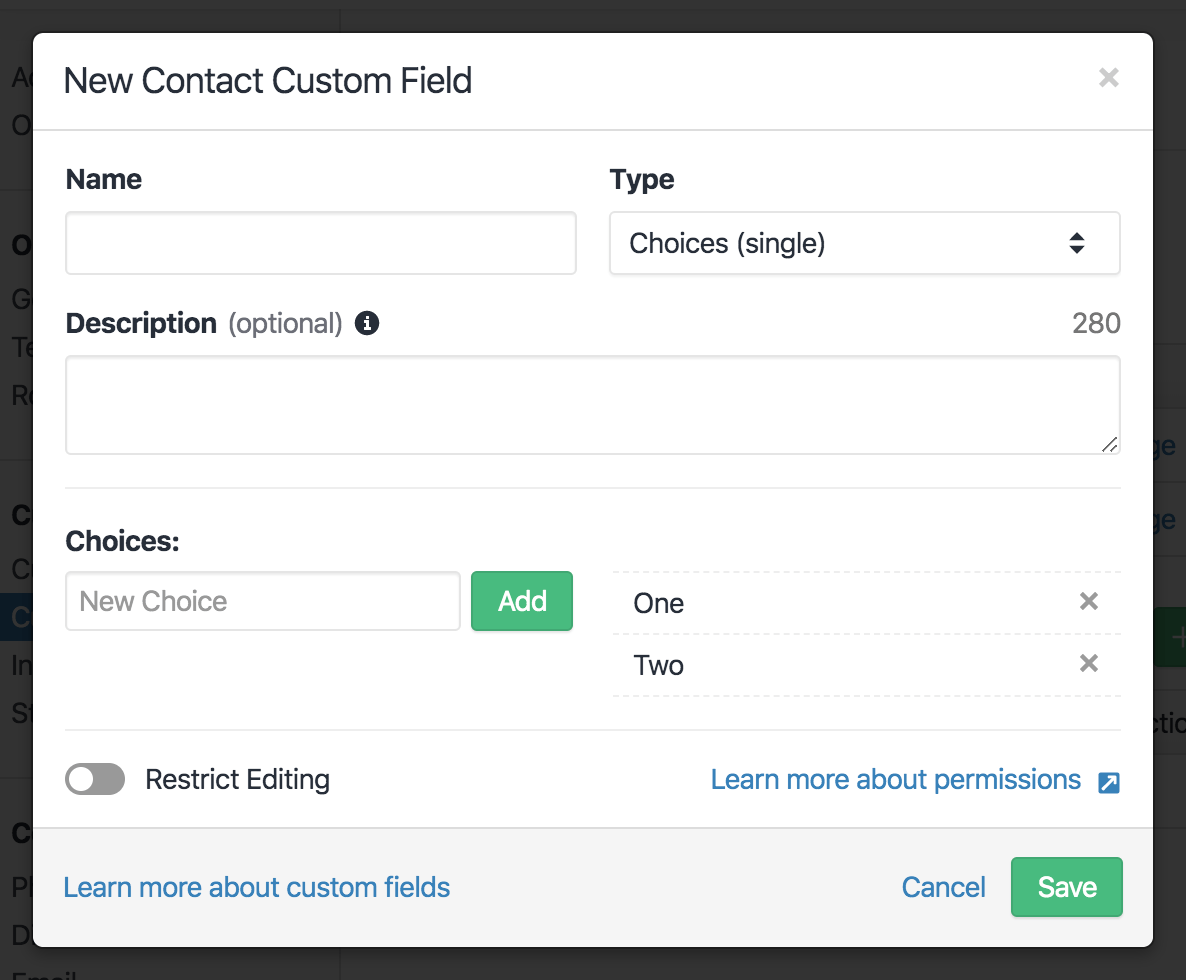
What about that innocent looking toggle at the bottom?
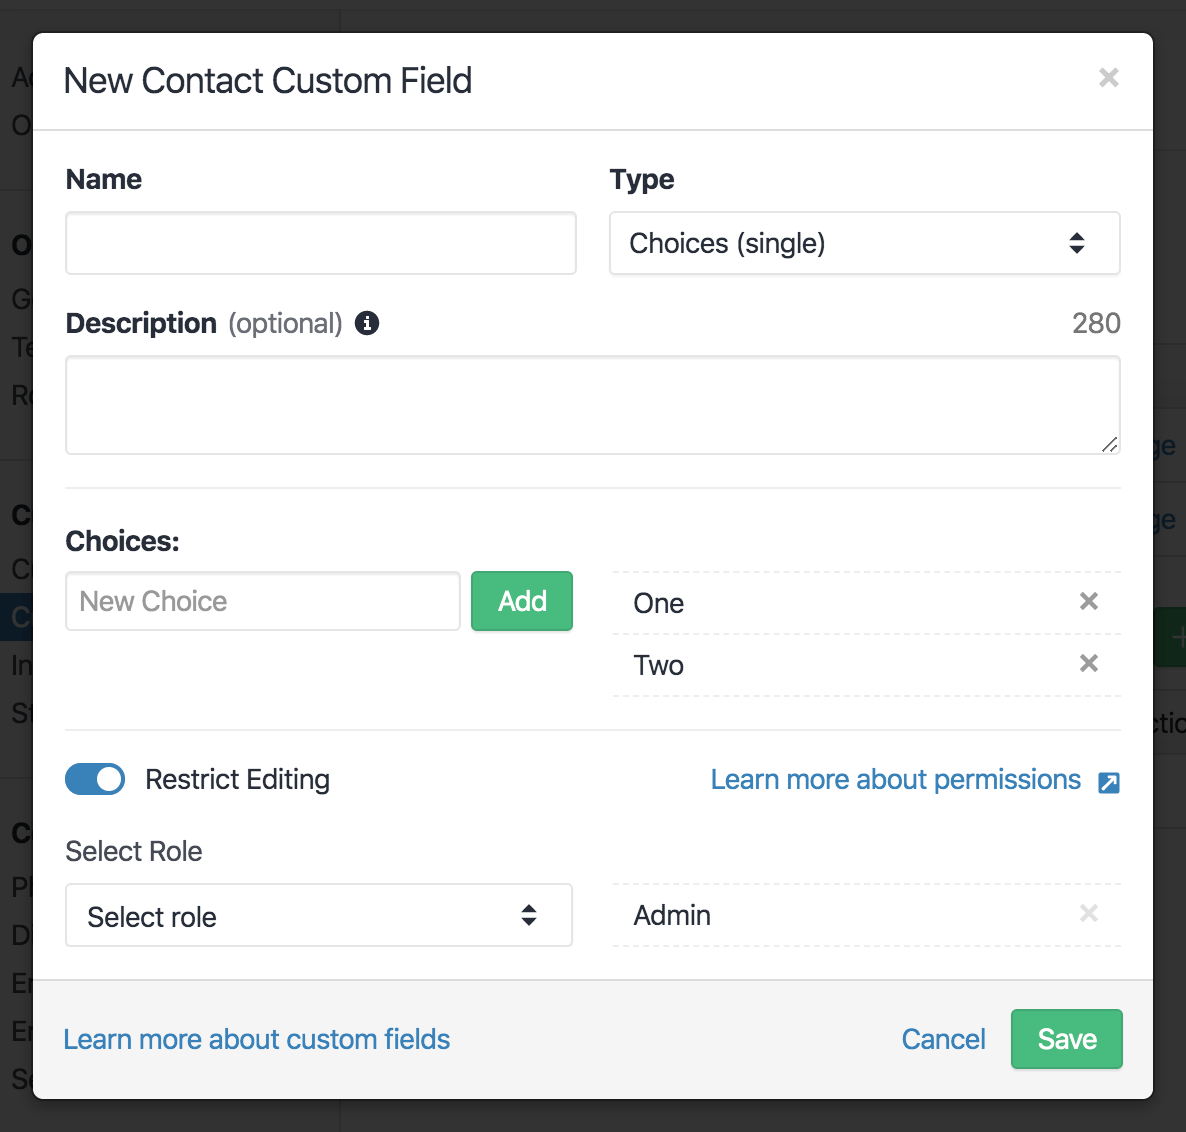
Or what about if you're editing an existing Custom Field and you want to change its type?

You get the idea. There's actually a lot more going on here than first appears. It's often super tempting to throw the baby out with the bathwater and try to rebuild something like this from scratch (especially if you didn't write the code in the first place - see Spolsky's fundamental law of programming), but hold your horses! Maybe you might get away with this for a simple component, but you need to know what you're getting yourself into, you don't want to realise you're in over your head a third of the way in. You need to fully audit what's going on, both how the UI actually works from a user's perspective and what the existing code is doing.
In our case, you can see (some of) the UI details in the screenshots above, and
the existing code for the Backbone View was 606 lines long, with an inheritance
hierarchy of four other classes (each between 100-200 lines each) between it and
Backbone.View. Oh, and a class mixin too. 😲
Doing this gives us a much more solid understanding and crucially makes our time estimates more accurate.
Testy McTestface
So, we also didn't have any test coverage for this component...
Jest already has istanbul built in
(Turn it on like so), so it's
super simple to find out what your test coverage is (although if it's 0 this
should be pretty obvious to you). We want it to be "full", to catch any
potential regressions
and you need to decide for yourself what that means.
🙂
Even if there had been full coverage though, how might it help when refactoring
a Backbone View to a React Component? We need to make sure these tests are
compatible with both frameworks. The first thought might be to write tests
in Cypress, after all we only care about
manipulating the DOM not how it's output, but Cypress tests are kinda slow,
and it means we'd need to instrument the whole app, make sure we had seed data
and navigated to the right page, etc.
The paradigm behind react-testing-library
is also to test the DOM, not the implementation! Can that help? Well,
react-testing-library
is a wrapper around
dom-testing-library,
and really it's all just about interacting with the DOM after rendering. We'd
already built ourselves
backbone-testing-library
to be able to write our tests in a similar format (which we've recently
open sourced). This means
it's super easy to port Backbone tests over to React Components with minimal
changes, especially if you utilize
Kent C. Dodds's AHA Testing patterns
to use sensible abstractions. For example, we added the following render helper
for our Backbone tests:
import { render } from '@closeio/backbone-testing-library';
import userEvent from '@testing-library/user-event';

import CustomFieldModalFormView from './custom_field_modal_form_view';

const renderCustomFieldModalForm = (options = {}) => {
  const renderResult = render(CustomFieldModalFormView, options);
  const { getByLabelText } = renderResult;

  const getTypeSelect = () => getByLabelText(/Type/i);
  const selectType = (typeValue) => {
    userEvent.selectOptions(getTypeSelect(), [typeValue]);
  };

  return {
    ...renderResult,
    selectType,
    // ...other helpers
  };
};
The Backbone View relied on a native Select, whereas the React Component uses a
custom Select Component, by using minimal abstractions inside the render helper
we can then keep test refactors to a minimum - we have a custom
pickSelectOption utility to help out here too. The React test then becomes:
import { render } from '@testing-library/react';

import { pickSelectOption } from 'test/utils/select';
import CustomFieldModalForm from './CustomFieldModalForm';

const renderCustomFieldModalForm = (props = {}) => {
  const renderResult = render(<CustomFieldModalForm {...props} />);
  const { getByLabelText } = renderResult;

  const getTypeSelect = () => getByLabelText(/Type/i);
  const selectType = async (typeValue) => {
    await pickSelectOption(getTypeSelect(), typeValue);
  };

  return {
    ...renderResult,
    selectType,
    // ...other helpers
  };
};
Because pickSelectOption is async, we had to do a minor refactor to make
sure all tests were async and awaited the UI action, but since the tests
only assert against the resulting DOM the testing code itself remained the same!
🥳
Go Forth and Reactize!
At this point you "just" need to write the Component, but you already have so much under your belt. Your ported React tests become your spec, and you can utilize TDD when actually writing code. Not only that, but by carrying out a detailed audit and writing the tests you know exactly how the component should behave, there's no guesswork or custom logic (read bugfixes) which could be left behind during a rewrite. You can be confident there will be little to no regressions introduced by porting the code. In fact, the only minor bug we experienced after integrating the new version was CSS related.
It can be tempting to add new features and/or refactor the React Component as you go, but don't! It's much more useful to have a working 1:1 React version of your Backbone View first, and the person reviewing your PR will appreciate the atomic commits. 😎
In our case the original Backbone View handled both data fetching/saving and UI rendering. After the initial refactor was complete and merged to master, only then was it separated into a "smart" data container and a "dumb" UI component. This pattern meant we could also swap the UI component around and plug it into different data containers. For example, our Contact and Lead Custom Field modals still needed to interact with the server via Backbone Models, whereas our new Activity Custom Fields modal uses Apollo/GraphQL.
The Backbone version also relied on a BEM namespaced global stylesheet, whereas we use LESS modules for our React Components. Like the above data refactoring, the Reactizing first pass simply copied over the Backbone handlebars markup, global styles and all. Once the tests passed, these styles were ported over to LESS modules in a single separate commit.
It's So Shiny
So now you have your shiny new React version, what's the best way to integrate
it? Ultimately this depends on your codebase, but likely part of the impetus for
doing this is you need it to interoperate with both React and Backbone. The
"data container" pattern described above will help with this, but you'll also
need some sort of utility to render React Components from Backbone. We have a
BaseView Backbone class to help handle this, with a method called
renderComponent, which takes the component (as JSX with props) as the first
argument, and a selector pointing to a child DOM element as the second. Apart
from keeping track of rendered components for later cleanup, it ultimately calls
ReactDOM.render - inserting your React controlled component into the DOM
beneath the Backbone controlled parent View.
Once integration is done, don't forget to manually test! If you have E2E tests even better, but your unit tests obviously aren't going to catch any integration issues. If everything's good you can now delete the Backbone View for good! 🎉
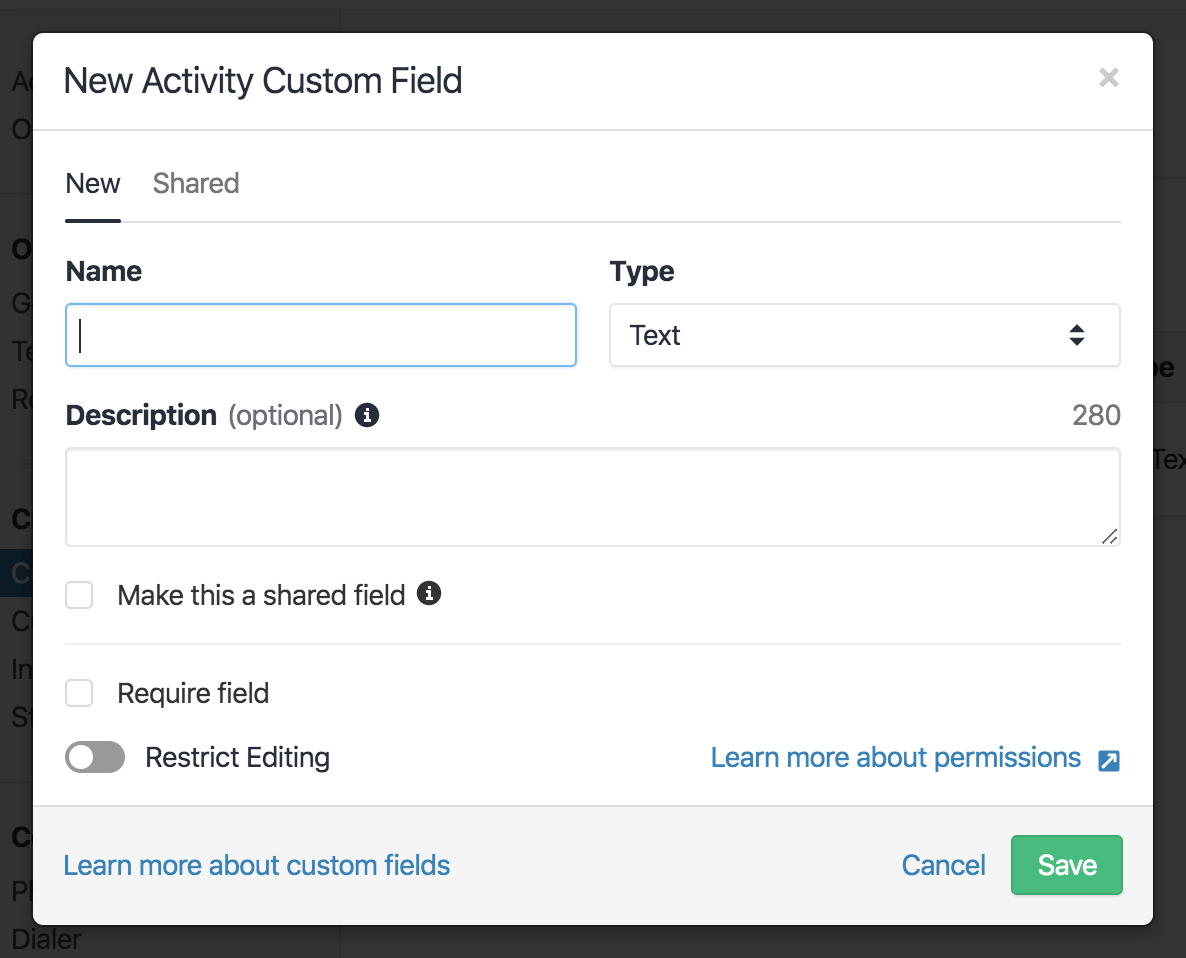
New Features
You're now finally in a position where you can add new features!
You can see below we needed to be able to put the existing UI within a tab in the modal as well as add new checkboxes in the form itself. Following the above process meant we weren't trying to hack this into an already creaky Backbone View. We could now compose smaller React Components together, which also made it easy to add new tests along with the new features. 🧘